
Read through the instructions before beginning and have all materials and supplies ready before beginning.
Materials:
- 3 or 4 miniature ceramic Christmas village pieces. For example a church, a store, and a house would be good choices. You can find these at the various dollar stores this time of year.
- 2 or 3 figures. For example carolers, a snowman, or children. Again, check the dollar stores. The figures are usually displayed with the village pieces.
- 1 or 2 gold wire tree (and guess where you can find these?!) In years past, these have come in several different sizes. You may have to improvise here and purchase small green trees and spray paint them. You want the trees to be in proportion to the size of the village pieces you have chosen. Many of the dollar stores sell the bottle brush type trees. I haven’t tried this, but imagine they can be spray painted and sprinkled with glitter. Or for contrast, leave green and paint the ends of the branches with gold glitter glue.
- Green doily or placemat to use as the base for your display.
- Set of 20 miniature white lights – for safety, make sure they are UL listed.
Supplies:
- Gold Spray Paint
- Gold Glitter
- Paint Brush
- Newspaper
- Waxed paper or plastic wrap
- A sturdy stick or dowel, 8 - 10 inches long
- Latex gloves
Directions:
1. When working with spray paint, follow the manufacturer’s instructions and work in a well-ventilated area, preferably outside.
2. Cover your work area with newspaper. Add a sheet of waxed paper or plastic wrap over the newspaper and anchor down.
3. Shake the spray paint according to the instructions on the can. Most of the building pieces will have an opening in the base from molding. Support the piece by placing the dowel or stick in the opening. It will not be secure so be careful with this. This is just to allow you to paint all sides of the piece at once. Oh, and put on those gloves!
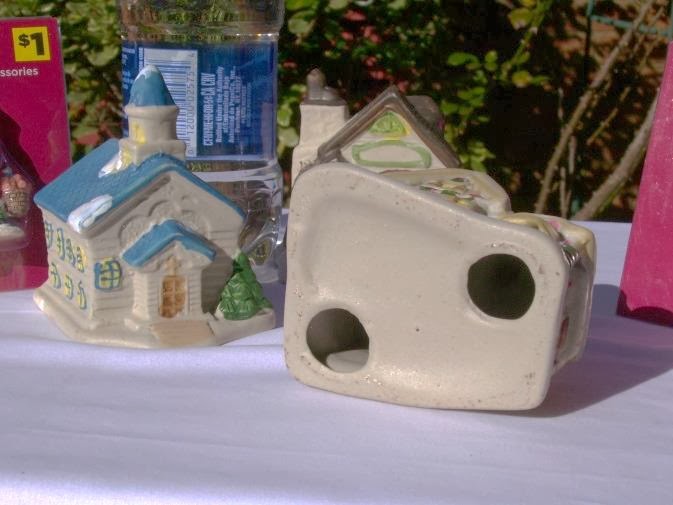


5. Continue spray painting the remaining pieces. You can see in the pictures that I didn’t get complete coverage during the first round of painting.


6. We’ll let the building pieces dry for a bit while we move on to the people figures. These are more difficult to cover as they are usually made from plastic. Place the figures, standing about 2 inches apart, on the waxed paper or plastic wrap. Carefully spray the pieces in short bursts covering as much of the figure as you can. Let dry. Again, don’t worry if they aren’t fully covered.


7. Let’s go back to the building pieces. They should be tacky dry by now. Give them at minimum one more coat of spray paint. Once you complete spraying a building, sprinkle with the gold glitter while the paint is still wet. Most of it should go on the roof of each building, but some will land on the sides and base. Again, don’t worry! It will look pretty and glittery when complete.


8. Make sure the people figures are dry before adding a second coat. If they did not cover well by spraying, I suggest spraying a pool of paint onto the waxed paper or into a cup and, using the paintbrush, fill in any missed areas. This can be frustrating, but cover the areas as best as you can. I had problems with the fresh paint lifting the first coat off. Just be patient and it will cover enough to look just fine with the white lights surrounding it. As I was working outside, the paint dried rather quickly and I was able to use a paint brush to touch up any areas that didn’t cover. I found that the figures with a lot of red on them were the hardest to cover possibly because of a component in the original paint.

9. Let dry completely, at least overnight, before displaying.
10. Arrange your completed pieces on the doily or placemat, placing the tree(s) at the back. Snake the strand of white lights through the village. The tree I used for this display, which I made for my Mom, is an ornament I found at the Dollar Tree.
11. Plug in and enjoy!

Happy Christmas Crafting!
Kathy
I do apologize for the layout of this post. Had a lot of difficulty. Not sure if it was the computer or the computer user.....
Very nice, I like it better than the original! Creative and will be great displayed for the upcoming holiday season! :)
ReplyDeleteThe layout looks fine to me!
I forgot to post my pic from the holidays... going to see if I can...
ReplyDelete